
The SPOT User Guide: Section 7 - Claim submission / ERA
The Claims submission / ERA option allows you to submit electronic claims via batch files and retrieve the electronic reports through TIBCO PartnerExpress. 837 and 837D claim files submitted using this feature must be in the ASC X12 version 5010. Allow two to three business days for claims to appear in SPOT after being submitted.
Open Claim submission / ERA feature
To open the Claim submission / ERA feature:
- Select Claim submission / ERA from the top menu
- Click the Claim submission / ERA link.

Figure 1: Claim Submission / ERA
A new browser window will open. If the new window does not open automatically, you may need to turn off your internet browser’s pop-up blocker or add the website address to list of the allowed sites.
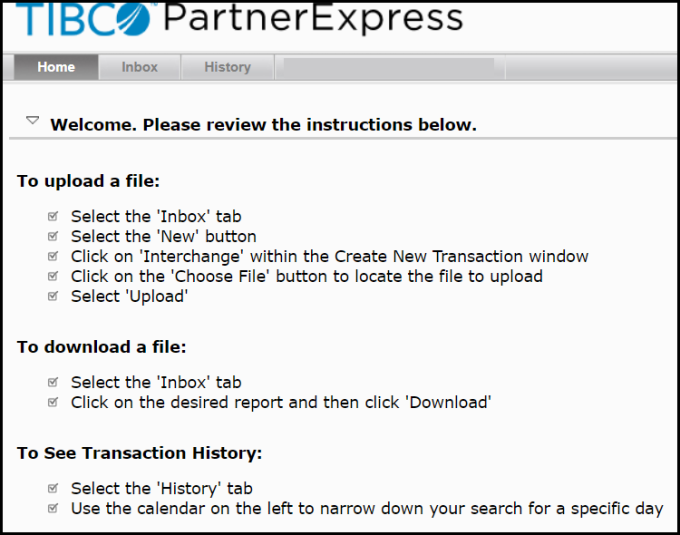
Figure 2: TIBCO PartnerExpress home page
Claim file submission
To submit an 837 or 837D claim file and retrieve reports:
- Click on the Inbox tab.

Figure 3: PartnerExpress inbox tab
- Click on the New button.

Figure 4: New button
- Select Interchange.
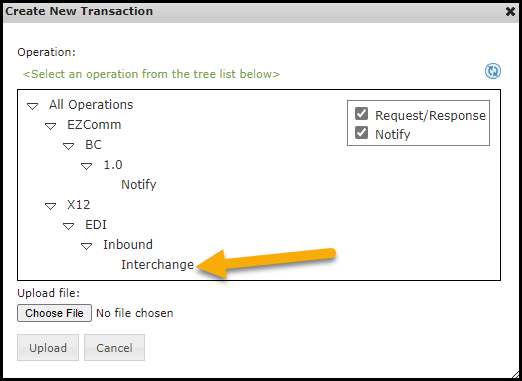
Figure 5: Interchange option
- Click Choose File and then navigate to the claim file. The location will depend on where your claim creation software saves the file. If unable to locate the file, please contact your software vendor. If you are using the PC-ACE software available through SPOT, navigate to the WINPCACE folder and look for the file named BCTRANS.DAT for Part A and BSTRANS.DAT for Part B files.
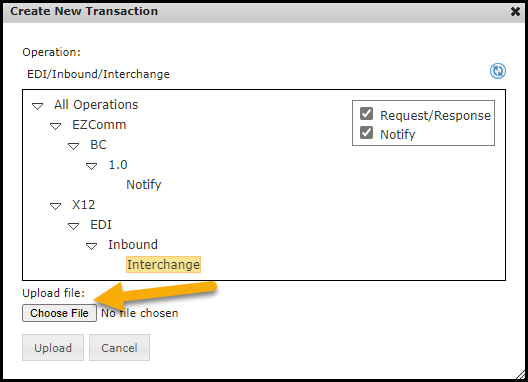
Figure 6: Choose File button
- Select the file(s) and click Open. The selected file will display in “Upload file” textbox.
- Click Upload to submit the file. “A new upload working” pop-up message will be displayed briefly.
Retrieve the 999 Acknowledgement Report
This report will display in the Inbox a few minutes after submitting an 837 or 837D claim file. This report will tell you if the file is initially accepted or rejected. If rejected, the report will give the reason for rejection. To retrieve the 999:
- Click on the Inbox tab and look for the Transaction ID starting with 999.
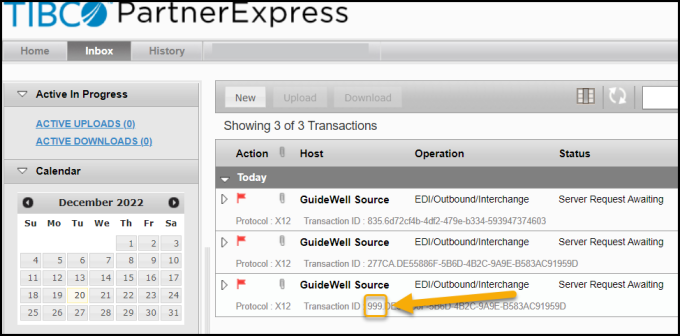
Figure 7: 999 report
- Select the report from the Inbox list and click Download.
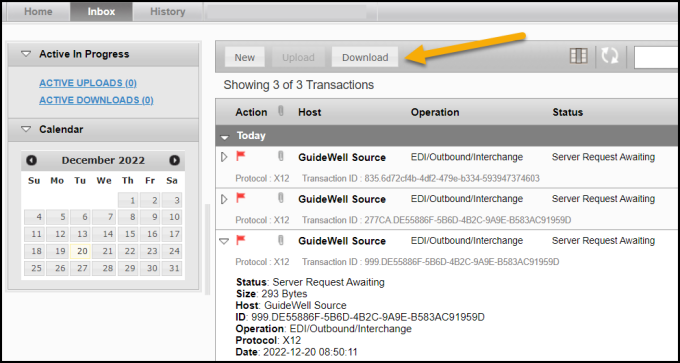
Figure 8: Download button
- Change the File name ending from .dat to .txt.


Figure 9: File name change
- Change the ‘Save as type’ field to ‘All Files (*.*)’.

Figure 10: Save as type change
- Navigate to the proper location on your computer and click Save.
- Open and interpret the 999 Acknowledgement Report. This report is not reader-friendly and will require software to interpret.
Retrieve the 277CA Claims Acknowledgement Report
This report will display in the Inbox a few minutes after a 999 Acknowledgement Report without any errors. This report will tell you if each claim was accepted for processing or was rejected. If rejected, the report will give the reason for rejection. To retrieve the 277CA:
- Click on the Inbox tab and look for the Transaction ID starting with 277CA.
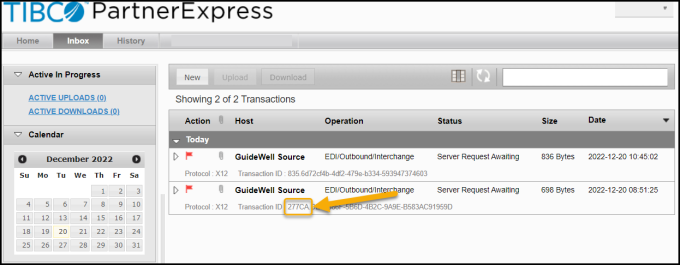
Figure 11: 277CA report
- Select the report from the Inbox list and click Download.
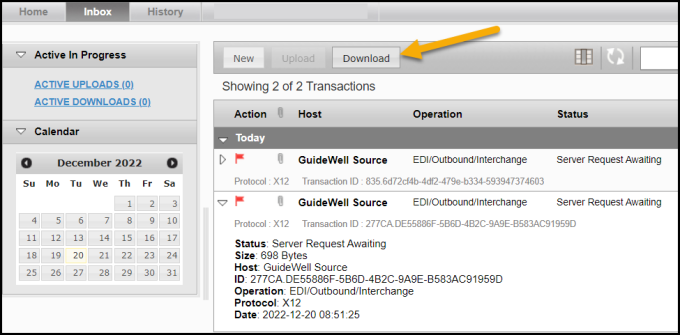
Figure 12: Download button
- Change the File name ending from .dat to .txt.


Figure 13: File name change
- Change the ‘Save as type’ field to ‘All Files (*.*)’.

Figure 14: Save as type change
- Navigate to the proper location on your computer and click Save.
- Open and interpret the 277CA Claims Acknowledgement Report. This report is not reader-friendly and will require software to interpret.
Retrieve the 835 Electronic Remittance Advice (ERA) Report
This report will display in the Inbox when claims finalize if the ERA is assigned to your SPOT submitter ID. That assignment is done with the ERA request section of the SPOT Enrollment Form.
This report will tell you the processing decisions after a claim in finalized. If the claim was approved and paid, payment details will be included. If the claim rejected, the report would give the rejection / denial code details. This report may be used in some software programs for auto-posting (if relevant, details would need provided by your software vendor).
To retrieve the ERA:
- Click on the Inbox tab and look for the Transaction ID starting with 835.
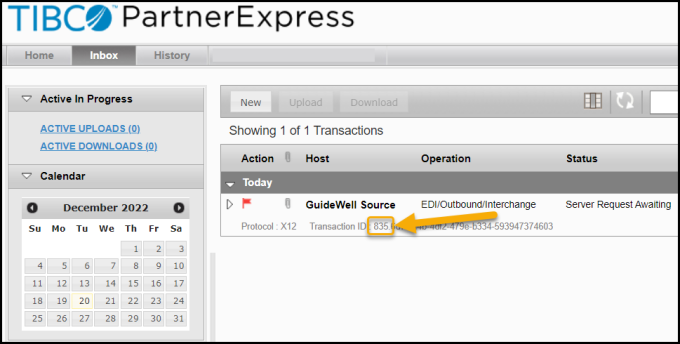
Figure 15: 835 report
- Select the report from the Inbox list and click Download.
- Change the File name ending from .dat to .txt.


Figure 16: File name change
- Change the ‘Save as type’ field to ‘All Files (*.*)’.

Figure 17: Save as type change
- Change the File name ending from .dat to .txt.
- Change the ‘Save as type’ field to ‘All Files (*.*)’.
- Navigate to the proper location on your computer and click Save.
- Open and interpret the 835 ERA. This report is not reader-friendly and will require software to interpret.
Identifying crossover claims on the electronic remittance advice (ERA)
If the insurer has a Coordination of Benefits Agreement (COBA) with Medicare, then Medicare will crossover and transmit enrollee eligibility data and Medicare adjudicated claim data to the supplemental insurer. Using the SPOT Claim Submission / ERA feature, the crossover information can be found on the ANSI 835 ERA in the "TRANSFER TO (COB)" field. The Trading Partner's ID will be located in the "ID CODE" field on the ERA. If the claim crossed over to multiple Trading Partners, only the first one will be listed on the ERA. Using the Trading Partner ID, you can look up the other insurer that the claim crossed over to here: COBA Trading Partners Customer Service Contacts - June 2022 (list of automatic crossover Trading Partners in production).
Transaction history
To view transaction history:
- Click on the History tab and look for the Transaction ID starting with 277CA.

Figure 18: History
- Review the list provided for status of previous transactions.
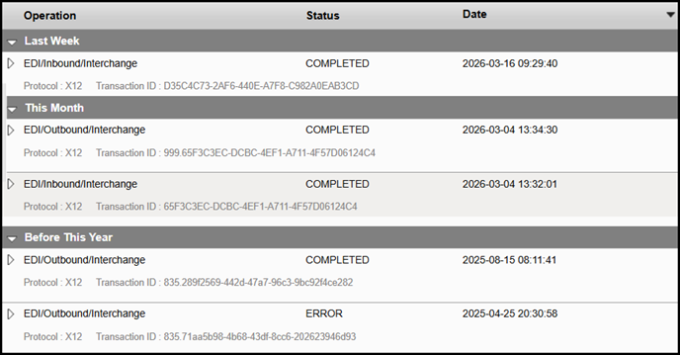
Figure 19: Transaction history list
- Optional: Use the calendar to narrow list to specific dates.
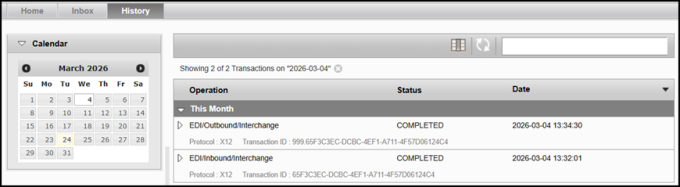
Figure 20: History calendar