
SPOT backup approver instructions
Is this the correct role for you? View role descriptions here.
Reminders for SPOT backup approvers:
First Coast would like to inform you of the requirements for Secure Provider Online Tool (SPOT) backup approvers. Your implementation of the following requirements will help to ensure consistent and proper SPOT access for you and your end-users, and will also help you prevent disruptions in the efficient operations of your organization.
- When requesting SPOT access, you should ONLY request the backup approver role, not end-user access. End-user access is included as part of being a SPOT backup approver.
- Refer to the CMS IDM User Guide (found on the CMS Guides & Documentation webpage for instructions on using the Identity Management system (IDM), such as how to approve your end users.
- You (or your office approver) must remember to recertify all your end-users annually.
- Please closely monitor your email for information on upcoming changes, enhancements, outages, and more
Once the office approver has created the organization in IDM, the backup approver may complete these instructions.
| Instructions | Navigation examples |
|---|---|
|
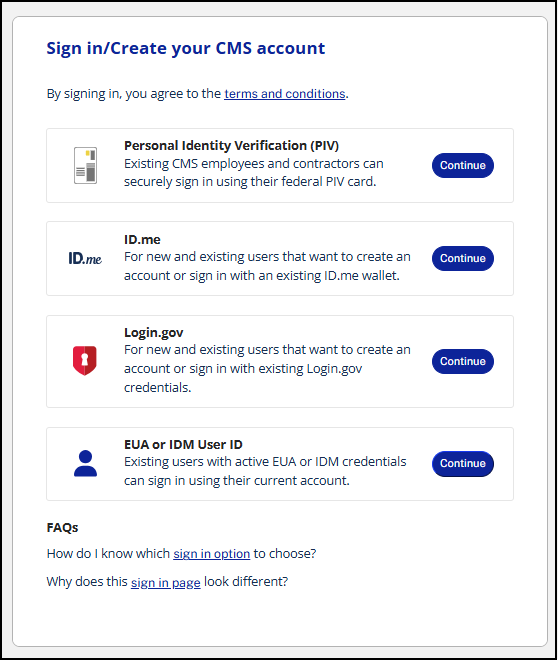
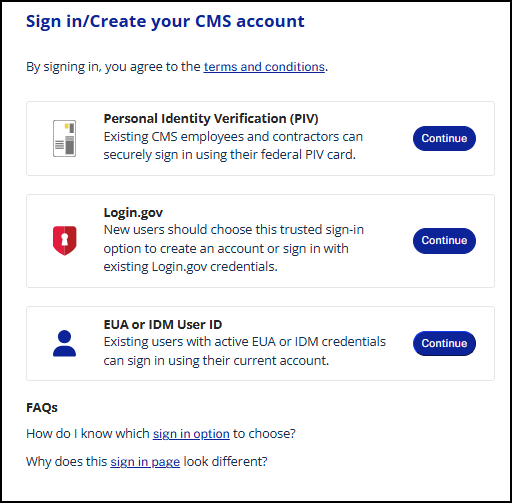
1. Navigate to CMS’ IDM portal. Click Continue next to the EUA or IDM User ID option.
Select link for New User Registration.
Note: If you already have an IDM account, skip to Step 5. |
  |
|
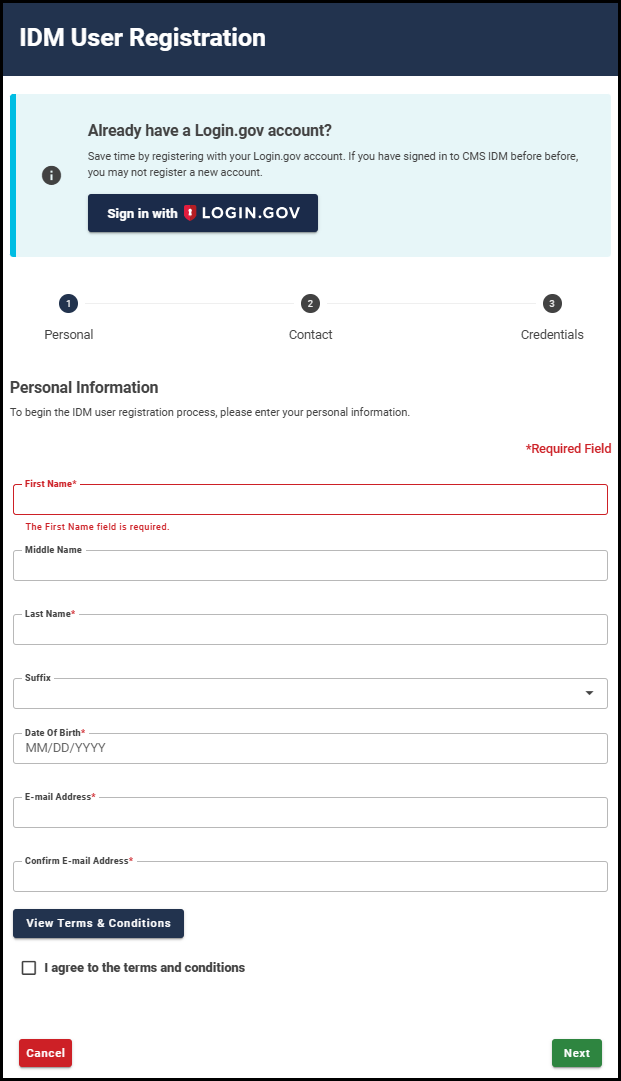
2. Register your information This portion of the application is based on your personal information. Note: Disregard the LOGIN.GOV sign in option. LOGIN.GOV accounts may not be used to access SPOT. The information you enter here will be important later in the process for securing your access to SPOT. Per CMS requirements, enter your:
Review the terms and conditions, check the box, and click Next to continue. |
 |
|
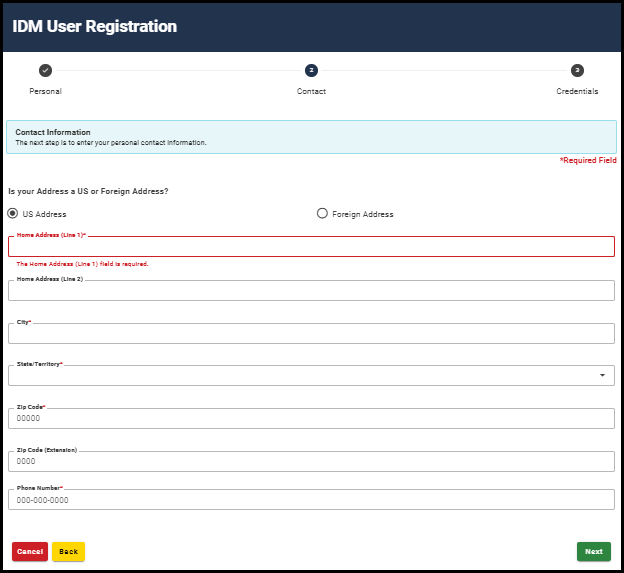
3. Complete your contact information Enter your:
Click Next to continue.
|
 |
|
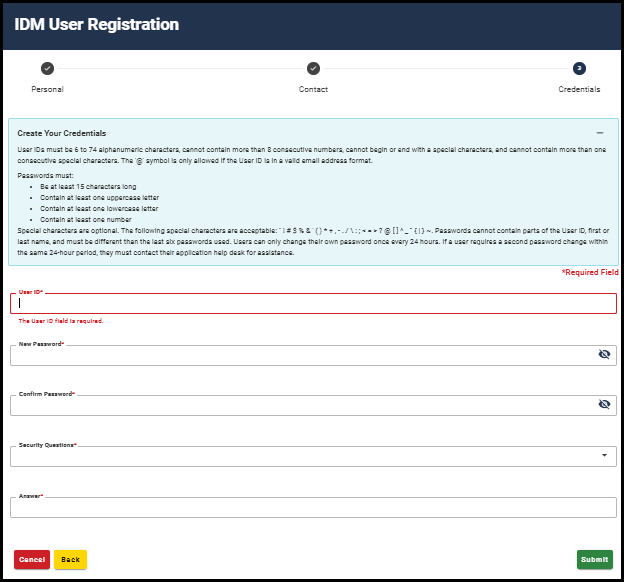
4. Create user ID, password and security Note: IDM and SPOT accounts CANNOT be shared. Each individual who needs access must create their own IDM account and their own SPOT account. Create a User ID for your IDM account, based on the provided parameters:
Create your Password for your IDM account, which must meet the provided parameters:
Note: Passwords may only be changed once per day. Confirm New Password Complete the Select Question and Answer section, which may be used to verify your identity. Click the Submit button. A message will display when the registration has completed. Click Return to proceed back to the login screen. |
 |
|
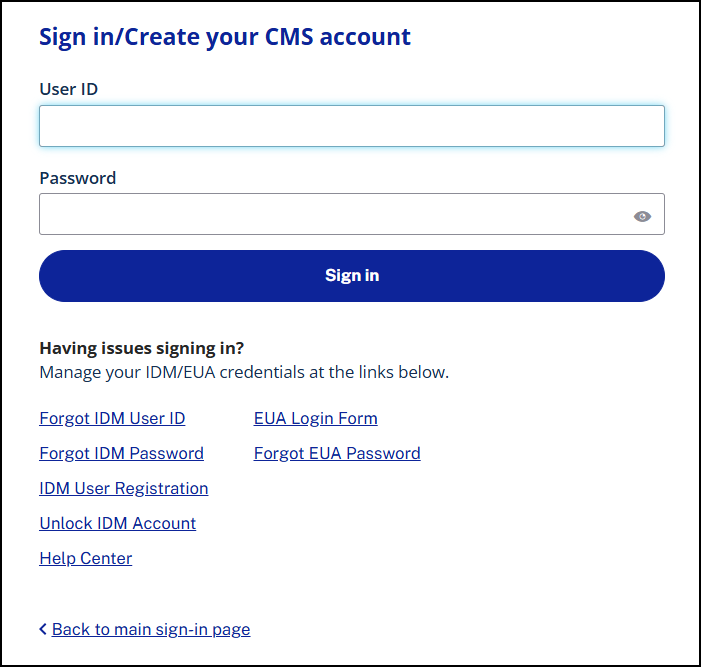
5. Log in Log into IDM with the User ID and password created. Remember to click Continue Continue next to the EUA or IDM User ID EUA or IDM User ID option on the initial IDM screen. |
  |
|
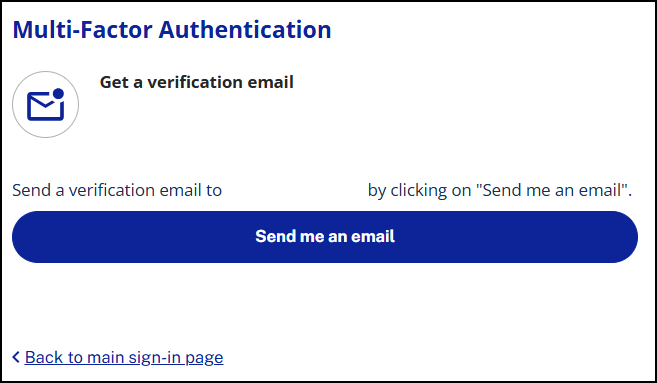
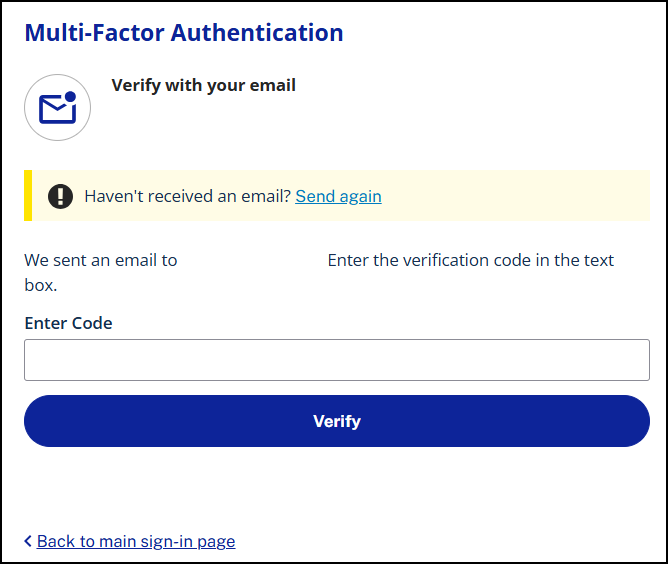
6. Verify with your email Click the Send me an email button. Access your email and open the email from IDM Auto Response to find the one-time verification code. Type the code in the Enter Code box and click Verify.
|
 |
|
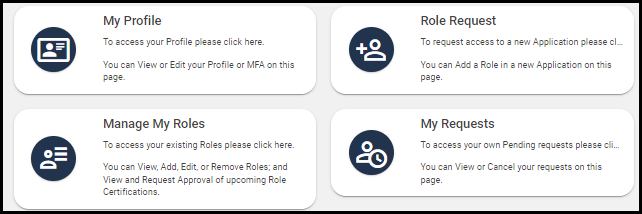
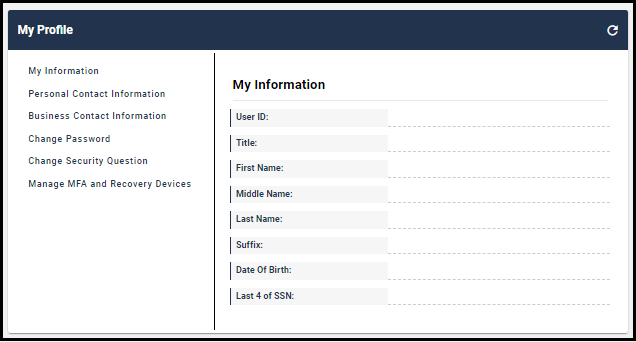
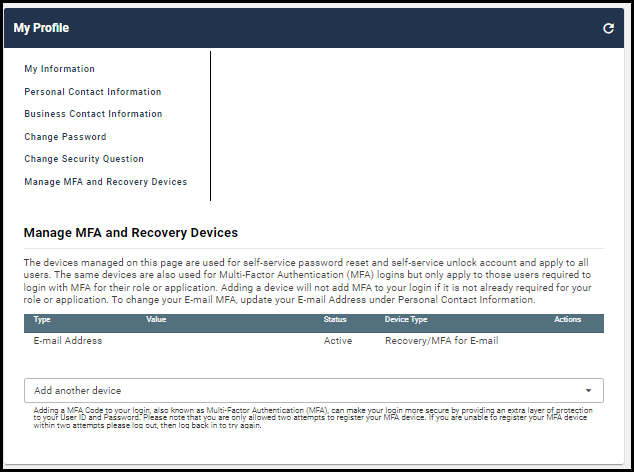
7. Set up another multifactor authentication (MFA) *Skip this step if you previously setup the MFA. Click the My Profile tile. Click the Manage MFA and Recovery Devices option. Click the Add another device dropdown arrow. Choose the best MFA factor for your needs. Follow the steps on the screen to complete the setup. Click Verify MFA and confirm the MFA. Click OK.
|
 |
|
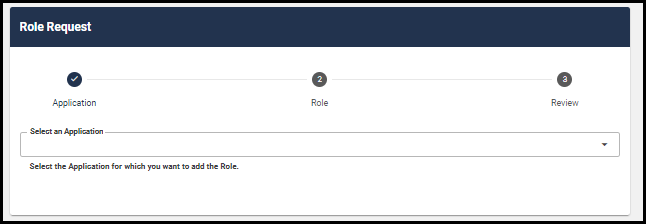
8. Role request Once you have logged in, click Role Request from the self-service options. |
 |
|
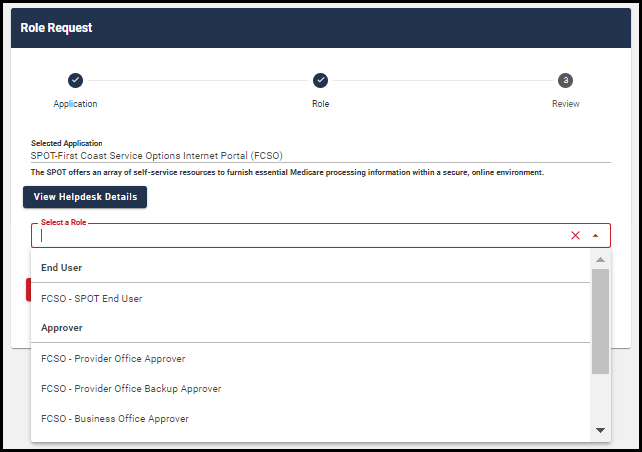
9. Select an application Type SPOT in the ‘Select an Application’ drop-down field and click on ‘SPOT-First Coast Service Options internet portal (FCSO)’ to proceed to the role selection. |
 |
|
10. Select a role Click on the drop-down menu next to ‘Select a Role.’ Select ‘FCSO – Provider Office Backup Approver’ or ‘FCSO – Business Office Backup Approver. (If you are a third-party biller, select Business Office Backup Approver). Do not select any other role. If you select the incorrect role, your application will be denied, and you will need to begin the registration process from Step 5. |
 |
|
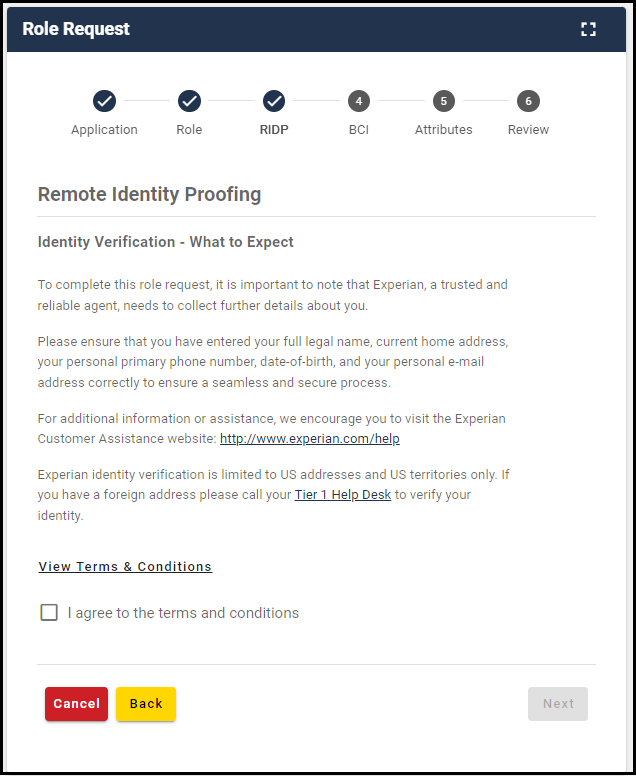
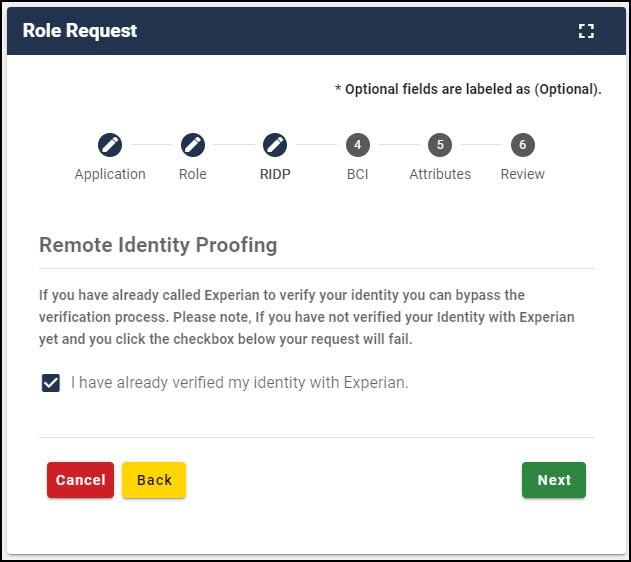
11. Review remote identify proofing information The next steps will verify your identity. Note: If you are NOT asked to verify your identity, skip to Step 15. This process is known as Remote Identity Proofing (RIDP). The Experian identity verification service is used by CMS to confirm your identity when you need to access a protected CMS Application. If you have not previously been through CMS’ required identity verification, you may be prompted for RIDP when requesting access to SPOT. Read the terms and conditions, check the box to agree, and then click ‘Next’ to proceed. |
 |
|
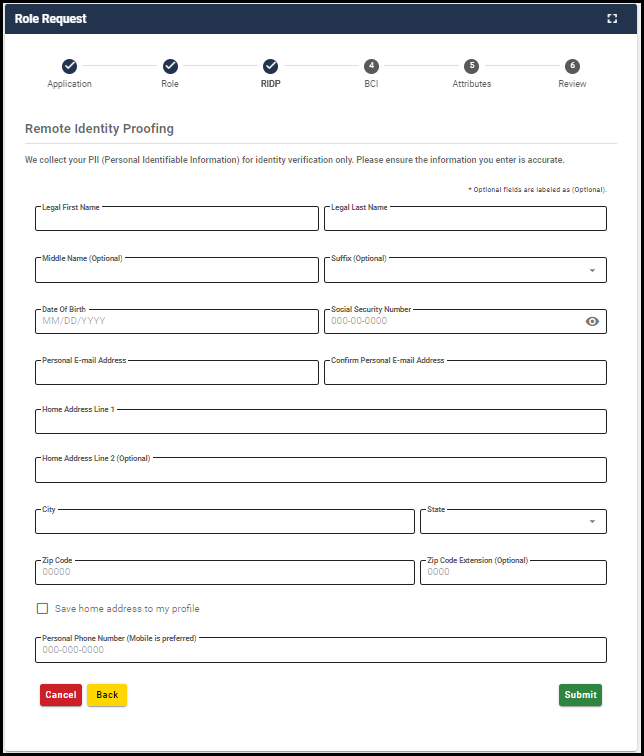
12. Complete the RIDP Use your personal information to complete all the required fields. You must use your full legal name. Refer to your driver’s license or financial account information. Tips: IDM validates the user’s identity based on the information on their Experian credit report. Please note that IDM does not check or impact the user’s credit. If any of the user’s information such as Name, Date of Birth (DOB), Social Security Number (SSN), Address, Phone number etc. on the user’s profile does not match, the user will not pass RIDP. It is recommended that if the user fails the first attempt, to log into Experian, validate the information on their credit report, and update IDM accordingly to avoid Manual Identity Proofing. Your surname and other information, such as date of birth, must match the information Experian has for you on file. Do not use nicknames. If you have a two-part name, enter the second part in the middle name field. (i.e., Mary Beth would have Mary in the first name field and Beth in the middle name field) Enter your current residential address:
Click ‘Next.’ If your information is verified, you have completed the RIDP process. Click Next and proceed to Step 15. |
 |
|
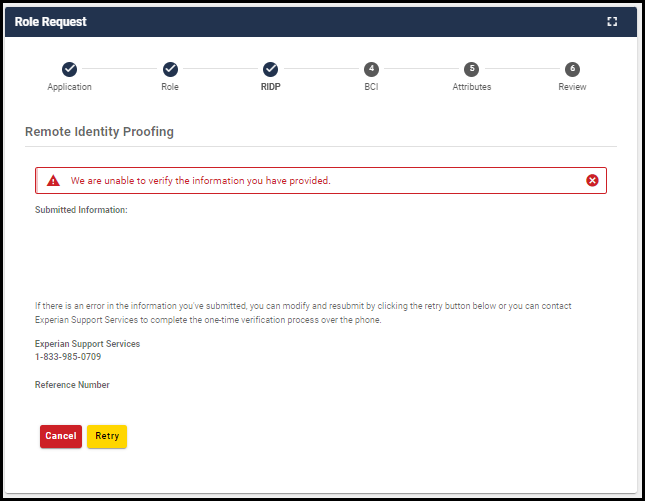
13. If your information cannot be verified… In the event your information cannot be verified through RIDP, you will be asked to contact Experian Verification Support Services. When you contact Experian Verification Support Services, please keep your ‘Review Reference Number’ close at hand. If Experian is able to resolve the information, return to Step 5 in this process by logging into your IDM account and begin the process of requesting access to SPOT. You may return to this application once you have resolved the issue with the Experian database. |
 |
|
14. Contacting Experian When you arrive at the Role Request process again, click the check box to confirm your Experian verification and click Next. Once you enter your information, the CMS IDM system will verify your contact with Experian. If Experian successfully verified your identity, you will be able to complete your request for SPOT. If Experian is unable to verify your identity, contact the SPOT help desk and request to be manually verified. |
 |
|
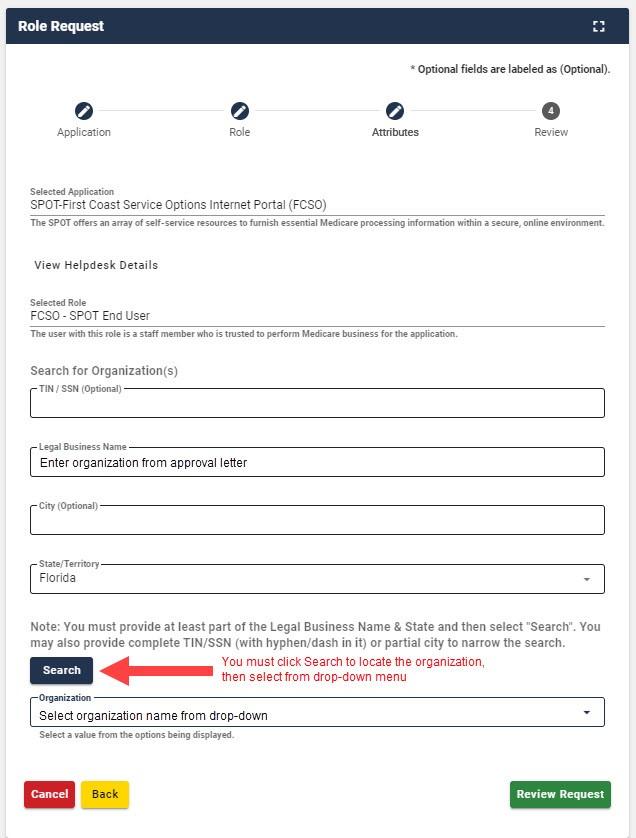
15. Find your organization On the screen, type in the Legal Business Name of your organization and select the State / Territory. Note: You must click Search to find your organization in the drop-down menu.
Click Review Request, review your information, enter your reason for request, and click Submit Role Request. |
 |
|
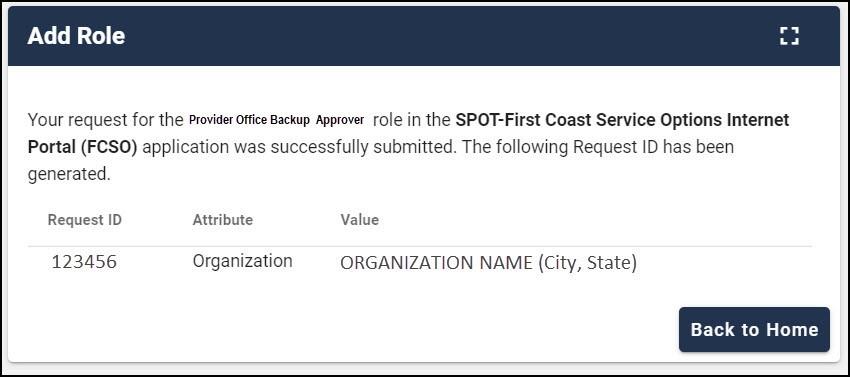
16. Request submitted The final screen will confirm that your IDM request has been submitted. You will receive an email confirmation once your request is approved by your approver. Note: If you need to add an additional role and access another organization, please follow these instructions.
|
 |
|
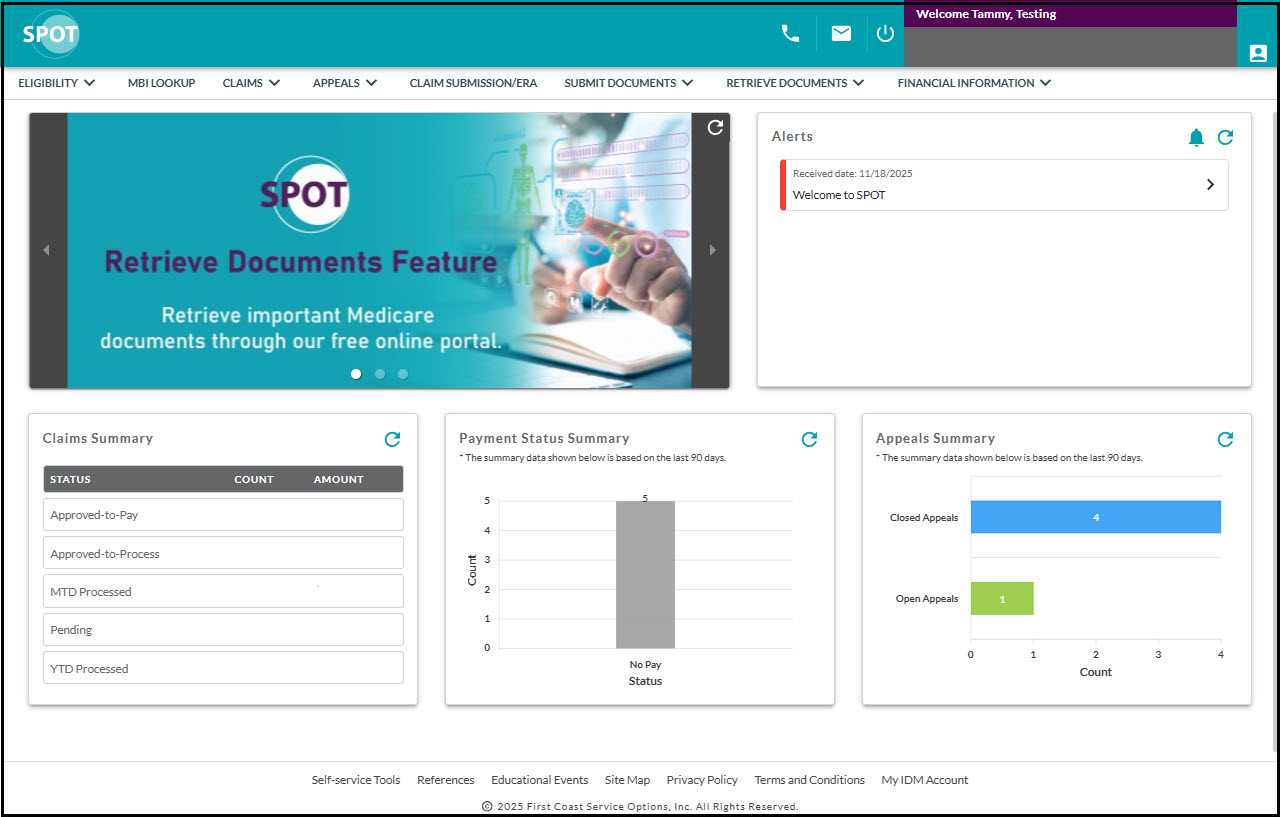
17. Access SPOT Once the request is approved, go to SPOTand sign in to access SPOT.
|
 |